Showing posts with label dining room. Show all posts

Thursday, October 11, 2012

My Fall Mantel


You thought I wasn't going to post today, didn't you? Well you were wrong. I overslept this morning and didn't have time for coffee, breakfast or blogging. Then I realized 10 miles from home and midway through my commute that I had forgotten my wallet and couldn't buy coffee. I decided to feel blessed that I sleep in such a comfortable bed and am accustomed to having access to enough money to meet my needs.

Yes, of course coffee is a need. Don't be ridiculous.

Blogging about my work from last night had to wait until Norie went to bed tonight. Don't worry, I already finished my Day 4, but I'll wait until tomorrow to tell you about that one. Technically I'm cheating a bit on my 25 Things plan, but I'm okay with that since I'm cheating by using a project I got mostly done several days ago. I'm considering it over achieving since I've been meaning to work on one for years and I finally did. It's my fall mantel.

Every year there is a series of "It's Fall Y'all" Autumn Link Parties thrown by some of my favorite bloggers and one of the parties is about fall mantels. I've never had my mantel together to share one the day of the link party, but I thought I just might make it that year.
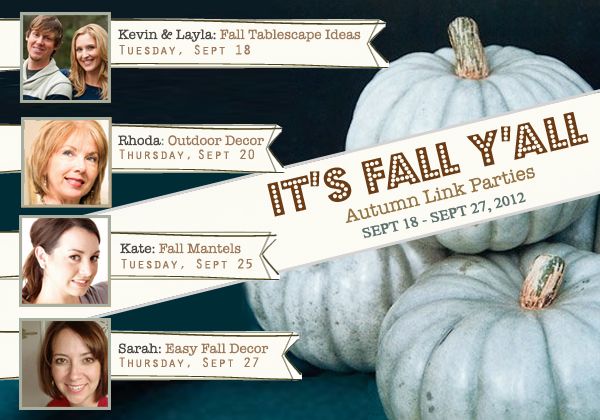


Yeah, that one. It was on Sept. 25th. I didn't quite make it. I did, however, finish my mantel for the first time ever (well, except for the writing on the DIY Chalkboard part).

This picture from the very first Whatever Craft Weekend was my inspiration.

Source: Whatever, http://megduerksen.typepad.com
I love absolutely everything about it. It's bright, it's cheery, it's colorful, it has pumpkins, and sunflowers, and bunting. It's fabulous.

I just noticed my version is lacking the white framed mirrors and I might have to do something about that. It has all the things I loved about the original though. I arranged some of the silk flowers I still have from our wedding with a fall arrangement I got last year and put them in vases I already had around the house. Austin sent me flowers in the striped vase way back in 2005. I added some fresh pumpkins (they might just be from the farm I worked on as a teenager) and hung a strand of paper bunting on sisal rope from the same nails we used for the bunting at the baby shower.


Can you tell bunting makes me really happy?


It's too late to add it to the fall mantel link party at Centsational Girl, but it makes me super happy every time I look at it.

Day 3 of my 25 Things plan and still going strong.

1. Buy a bracket and rehang the blinds in the bedroom
2. Plant the mum by friend Nancy gave me
3. Write something on my DIY Chalkboard
4. Finish my fall mantel
5. Take Norie's four month pictures before she's five months old
6. Finish the wedding plate wall art
7. Make some bunting for my office
8. Build a pallet bar/wall art to cover up the attic fan switch
9. Make a DIY ribbon chandelier for Norie's room
10. Do something with the shutters my aunt got me last year
11. Put the label plates back on the enormous drawer thing and label the drawers
12. Finish the wall art I started for the Song print I got for donating to Love Without Boundaries
13. Finish my desk
14. Finish the table scape for Campbell Family Thanksgiving 2012
15. Hang the awesome owl latch hook my sister gave me at Norie's baby shower
16. Clean up the porch
17. Finish the October page in my pregnancy scrapbook (yes, that would be last October)
18. Fix the leg on the coffee table and finish repainting it
19. Sell the coffee and end tables
20. Make a coffee table
21. Create a gift wrapping/gift wrap organizing space
22. Start working on fun holiday decorations
23. Finish the other Dream Dollhouse from last year's Make Two Challenge
24. Make some DIY cake stands from wedding plates and candlesticks.
25. Make map mats for vacation photos

Tuesday, September 18, 2012

DIY Chalkboard Upcycled Mirror

Hey kids! It's (How)Tuesday. I haven't done a how-to post in a while but felt inspired to bust one out today even though on this project what I really learned was what not to do. Don't worry. Doing it right it's not super elaborate or time consuming, but I think it made a big improvement. I had everything on hand so it was free to do which was an extra bonus, especially since I think I'll need to do it right one more time if I want it to be perfect.

I started with this fabulous mirror a mirror with a similar vibe to this one that my mom pulled out of someone's dumpster or off their curb or something. I forgot to include the picture and it's on my laptop which is in intensive care at the moment.
Interesting note: I had to image search "etched mirror goose" to find that image. If you image search "duck mirror" you get a TON of pictures of this


Anyway, she left the mirror on my porch and I poached it. I figure if I make use of it becomes mine. Adverse possession and whatnot. 

I gave it a quick coat of chalkboard paint (no primer, no nothing) and sent this text.


I gave it a couple more coats and left it on the porch for a month or so before I got back to it. Hence the date of that text relative to now. I have a baby, okay?

When I did I noticed that it had some serious brushstrokes.


See those little lines? They looked worse in person and something told me they might be a little problematic for writing. I did some internet research and found this helpful tutorial.

Turns out you should, at least theoretically, use primer and a foam brush and apply the coats are right angles to each other. Not exactly earth shattering, but potentially important. I sanded the surface in a circular motion with a sanding block to smooth out the lines until it felt smooth and gave it another coat with a foam brush and perpendicular to the previous ones. in case you're curious I didn't have any issues with the paint standing up to sanding even without primer so I'd just skip it out of laziness. It probably really still needs another coat of paint to be totally smooth, but I decided to hang it up instead. Perfect is the enemy of done and done is pretty important to me at the moment.

Here it is above my mantel.


Stay tuned for my fall mantel reveal next week. I'm going to join a link party on Centsational Girl on the 25th.

Monday, February 27, 2012

Tab Top Curtains made from Ana White's Free Plans

I started a project and finished it this weekend. That's one whole thing I can check off the To-Do List.

  • Put up actual curtains in the dining room.


Check.

No, the color is not off in the picture. The walls are actually that kind of sick green yellow, hence "Paint the dining room" is also on the To-Do List. I did, however, take this picture with my phone before I left for work this morning. Hopefully I'll get some glamor shots of them this weekend or maybe an evening now that the sun is staying up a little later in the evening.

I made them myself for $10 using Ana White's Tab Top Curtain instructions and fabric I found on clearance at Walmart for $2 a yard.

They are amazing and easy. I think I know how I'm making the curtains for the nursery and the office/guest room. Which has an actual bed frame now. I'll post with it when my parents bring me the headboard my mom saved off the curb. Actually, that might have to be a whole series of posts since I'm getting a LOT of awesome stuff when they come visit me. :)

Saturday, February 25, 2012

Adjustments to Ana White's free Farmhouse Table plans

I've gotten a couple of requests for the plans I used to build my dining room table on my Brag Post over on Ana White's website. For the record, These plans are based are Ana White's original plans which you can find here. She deserves the all the credit for the original plans and for giving me the confidence to build this table. I am only posting on the changes I made to her original plans here to help clarify what I did that isn't in the original plans.


Dimensions

I made my table larger than hers (slightly wider even than the 96" Farmhouse Salvaged Wood Rectangular Extension Table it was based on).  The overall dimensions are 96"L x 43 1/2"W x 31"H. With the 15" extensions installed it's a whopping 126" (that's 10 feet 6 inches) long. It seats 8 comfortably, 12 with the extensions.

Materials & Tools

Shopping List:

Follow Ana's list for everything but the lumber. For lumber you will need:

8 – 8' 2x4s
7 – 8' 2x2s (get 8 if you're building both sizes of extensions)
8 - 8' 2×8s

Tools:
You need a 1/2" drill bit in addition to the tools listed in the original plan.

Cut List

The changes I made resulted in some changes to the cut list. This is the complete list of my cuts.

A) 4 - 2×4 @ 29 1/2″ (Outside Legs)
B) 4 – 2×4 @ 29 1/2″ (Inside Legs)
C) 2 -2×4 @ 36″ (Bottom End Supports for the Stretcher)
D) 1 – 2×4 @ 78″ (Stretcher)
E) 2 – 2×4 @ 73 1/2″ (Side Aprons)
F) 2 – 2×4 @ 29 1/2″ (End Aprons)
G) I didn't cut these pieces since I eliminated the overhang supports on the ends.
H) 2 – 2×2 @ 70 1/2″ (Overhang Supports, Sides)
I) 7 – 2×2 @ 29 1/2″ (Under Tabletop Supports)
J) 2×8 @ 43 1/2″ (Extension Boards) - I would recommend building the table and checking the width before cutting these. You'll need 2 to make 7 1/2" extensions and 4 to make a set of 15" extensions. 6 if you want both.
K) 6 – 2×8 @ 96″ (Tabletop Pieces)
L) 4 - 2×2 @ 20 1/2" (Extension Spacers)
M)  4 - 2×2 @ 28 1/2" for 7 1/2" extensions, @ 36" for 15" extensions. One end cut at 45 degrees (Extension Supports)


Steps 1-5

Follow the steps as shown in the original plan. The only differences are that the legs are an inch longer, I only cut the notches for the notches at the bottom 1 1/4" deep, and I put the notches on opposite sides of the legs so that the stretcher support would be on the outside. That makes the stretcher support stick out by 1/4". Both changes make it more similar to the RH version.

Your outside legs will look like this


and the inside legs will look like this.


Which means the legs will go in different positions than they would in her plan, but you put them together in the same way in Step 4.

I cut the notch in board C 1 1/4" deep in Step 5.


Step 6-7

I followed the NOTE in the original plan and switched the legs in Step 6 then followed the directions exactly as in the original plan just with boards cut to my dimensions.

Steps 8-9

Before I built the apron, I cut 1 1/2" wide notches in the end apron pieces 3" in from each side. Cut the notches a little wide so that a 2 x 2 can easily fit in the notch.


Step 10

Place the supports on the ends 10 1/2" from the sides. The rest I spaced at roughly 5 1/2" following Ana's directions.


Step 11

I only used side overhang supports (the long ones).

Steps 12-13

Skip them since this table has extensions instead of a permanent breadboard end.

Step 14

This is where I went freestyle. I didn't want to be able to see the screws in the top of the table so I screwed everything in from the bottom.  You can skip this step too.

Step 15

The table only has 6 boards on the top so the two center boards are lined up with the center of the table. Center them lengthwise as well and screw them up through the table supports ignore the fact that I failed to include the side supports in the diagram. They should be there.


Step 16

Fill in the table top with the other tabletop boards. The four center boards are attached to the table supports.


Step 17

The last two boards are only attached to the side apron and 2x2 side supports. Sounds dicey, huh? Not really, It's three whole inches out of the 7 1/4" width of the boards.

To attached them, drill 1/2" holes 1 1/2" up through the side aprons. This would be a lot easier if you flip the table over on its top. You'll need help though since its 8 feet long and probably weighs 150 pounds. TIP: If you put a piece of tape 1 1/2" from the tip of your drill bit you'll be able to see when you have the hole deep enough.

I did one about every 6". (They are basically really deep countersink holes that will allow you to get a drill bit in to attach the boards with 2 3/4" screws.) Also drill on about an inch in from either side of each of the board in the end apron (make sure you don't try to put one of them up through the notches). This is a lot of holes and I'm pretty sure its the step where I burnt out my cordless drill. I invested in a corded one.


Also predrill countersink holes in the overhang supports every 6" offset with the holes in the side apron.

Step 18

Attach the boards with 2 3/4" screws in all the holes you just predrilled. It's 48 screws in case you're curious. Those boards aren't going anywhere.

When you're done you'll have a table that looks like this and probably feel like taking a break from building for a day or two. You don't have to make them at all, but I like how they look and they increase the overhang on the ends so you can push a chair under the table which is nice.


Step 19

Predrill and attach the extension spacers to the underside of the end overhangs. Make sure they line up with the inside edges of the notches.


Step 20 

Predrill and attach an extension spacer to the center of each of the extension end boards along the edge of the board.

Step 21

Predrill and attach the extension supports to the extension boards. TIP: Make sure they are square with the board and line up with the holes you cut in the apron ends of the table. I actually put the support pieces through the notches and attached the extension board in place to make sure it would fit.


Step 21

To make the 15" extensions repeat Steps 19 and 20 using the 36" extension supports. Then add the other extension boards inside of the first.


Step 22

Slide the extension into place (they aren't actually attached to the table at all, but they won't move, I promise. Admire your ridiculously awesome and enormous table.


I hope that makes sense. Let me know if you still have questions. :)

Sunday, November 14, 2010

First up, the dining room.

Austin and I are hosting Thanksgiving. A little crazy for people who closed on our first home on November 5th you say? Yep. Pretty much. But that's what I love. Making things mine rapid fire. The dining room is the number one priority since it's the site for the big event.

In case you don't remember, this is the dining room.


Or at least that's what it looked like when the previous owners lived here. A little boring. Maybe they took decluttering and depersonalizing a little too far. Or maybe they just didn't really have much interest in the dining room. I'm not sure, but I am sure that table looked little and sad. It really didn't fill out the room.

Then we moved in.


Still boring and sterile and our little table didn't really work either.

Good thing I have a plan. I've been thinking about this house and what I want to do to it for months so it's not like I haven't had the time to plan. Including drawings. By Thanksgiving it will look like this.


Well, sort of like this. Hopefully without the enormous cup and saucer floating overhead. And the table going the opposite direction. I clearly didn't quite remember the dimensions of the room at the time.

First project, get a table that both fills out the 12'x17' room and seats enough people that we can all sit together at Thanksgiving.

Check.

No seriously. I got a little help from Ana White. I built this table over the weekend. Well, not quite this table. It's a little closer to the original, complete with extensions and 43 1/2" wide. It still needs to be sanded and stained so I won't unveil it just yet, but soon. I promise.

I should probably also get on that finding chairs to sit in project, but they aren't in the drawing so I guess technically they aren't required.

LinkWithin

Related Posts Plugin for WordPress, Blogger...